How to Have your Canvas Stretched

Canvas prints have evolved and made an impeccable space in the world around us. Today, people love to treasure there special moments not in a digital format but by printing them over the canvas. While most of them prefer to order framed canvas prints online, there’s a good number of people who consider stretching them by self.
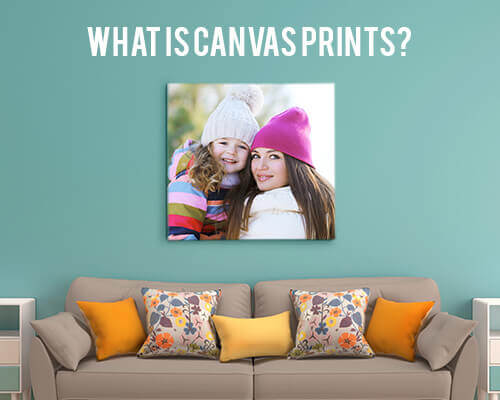
Understanding canvas prints and the wrap
Before we move ahead, it is important to understand that the beauty of a canvas print largely depends on the way your canvas print is wrapped. The reason why many canvas prints provider fails to make that irrevocable space in the heart of their customers.

At CanvasChamp, we are often contacted by people expressing their desire to order rolled canvas prints and have them framed by self. To ensure that you get the best experience with it, we are here today to share with you how you can have your canvas stretched by self.
How to stretch your canvas print-Do-It-Yourself
In the event that you are prepared in extending canvas, possess the proper instruments, for example, extending forceps and a staple firearm, and have the persistence to extend by hand, you have the alternative of purchasing pre-scored stretcher bars which will additionally bring down your cost.
With pre-indented stretcher bars, a few wood alternatives are accessible, for example, pine wood and fir wood. You can have the stretcher bars and other required materials from our online store at nominal prices.
Here are the twelve simple steps to do the same:
1. GET THE RIGHT TOOLS
The apparatuses required for extending a canvas are direct. Here we have laid out the fundamentals you will require: an elastic hammer, a couple of extending forceps, a solid match of scissors, a mallet, an overwhelming obligation staple weapon, a staple lifter and an estimating tape.
2. Set up A STRETCHER
Lay out two sets of stretcher bars – shop purchased ones are ordinarily cut with a mitred-mortise and join joint so no extra settling is required. Utilize an elastic hammer to thump them in to put. Measure and contrast the diagonals with guarantee you have made an impeccable rectangle.
3. LAYOUT YOUR CANVAS
Lay out your canvas move on a level work surface secured with a plastic sheet. On the off chance that the canvas is pre-prepared, ensure the prepared side is looking down. An extended canvas will look more expert if the weave of the material runs parallel to the edge of the stretcher bars. Step by step instructions to extend a canvas
4. MEASURE THE EDGES
Measure a separation of 7.5cm far from the two sides of the four corners and check with a pencil (for box canvases, this should be bigger). With a long ruler, draw lines between the pencil imprints to shape a rectangle around the stretcher edge. The most effective method to extend a canvas
5. CUT CAREFULLY
Working your way around your pencil lines, trim off the overabundance canvas conveniently – this will make the extending simpler later on, and furthermore give the back a neater, more expert appearance. Take mind not to thump the casing and, in the event that you do as such, realign it precisely.
6. STAPLE THE SIDES
Crease one side of the canvas back finished the edge. Utilizing your extending pincers, grasp the focal point of that same side of canvas and force it more tightly still. Secure with a staple in the focal point of the edge. Rehash this procedure with the contrary side of the edge. At that point, turn the casing 90 degrees and rehash the procedure on the staying two sides.
7. Discover A DIAMOND
Lifting up the canvas will help you to judge whether you have the required strain. The four staples should pull the canvas rigid, framing a precious stone shape like the one above. In the event that one of the sides of the precious stone doesn't seem sufficiently tight, expel the important staples, lay the canvas down and rehash stage 6.
8. Include TENSION
With four sides of the canvas secured, you have to start to work your way to the corners, fixing and stapling as you go. Workaround the casing in an example: add a solitary staple to the close side, at that point the far side, at that point one to one side, at that point the left.
9. Overlay UP THE CORNERS
As you work your way to the corners with the staples, guarantee that the canvas twists up in to a lip shape, like the one presented previously. This will guarantee you can overlap the corners over flawlessly.
10. STAPLE AGAIN
The instruments required for extending a canvas are direct. Here we have laid out the nuts and bolts you will require: an elastic hammer, a couple of extending forceps, a solid match of scissors, a sledge, an overwhelming obligation staple weapon, a staple lifter and an estimating tape.
11. NEATEN THE FINISH
In the event that you are a spot hand at "healing center corners" when you make the bed, you shouldn't locate this following stage excessively troublesome.
Pulling the side tight one final time, overlap one side of the corner over into a perfect, triangular corner and staple crosswise over it. Next, get your finger inside the overhanging lip of the opposite side of the canvas and haul it out, so you can make a square corner.
12. Completing TOUCHES
To build the strain and fortify the sides of your canvas, pound in little wooden wedges to the openings gave on your stretcher bars. In the event that you didn't choose a pre-prepared canvas move, you can size and prime it before it is prepared to go.