How To Hang Your Canvas Wall Art?

Listen to Content
Hanging canvas art is easier than most people think. A few simple tools and the right approach are all it takes to get your prints securely on the wall. Be it small photo printed on a canvas or or a large statement piece, here’s a simple guide to hanging your canvas securely and straight on the first try.
Tools You’ll Need To Hang Canvas Prints
Before you start, gather a few basics so the process goes smoothly:
- Pencil
- Measuring tape
- Hammer
- Level
- Nails or screws
- Sawtooth hanger, D-rings, or hanging wire
If you’re looking for how to hang canvas without nails, heavy-duty adhesive strips or hooks are a good alternative.
Most custom canvas prints from CanvasChamp arrive ready to hang, but if you need extra hardware, you can order a hanging kit that includes everything in one pack.
Hanging Small and Medium Canvases
For prints up to about 16 x 24 inches, a simple nail and sawtooth hanger setup is often the best way to hang a canvas. It’s quick, reliable, and doesn’t require more than a few minutes.
Step 1 – Mark the wall
Hold your canvas where you want it to hang and make a small pencil mark at the top center. This will guide where the nail should go.
Step 2 – Attach the sawtooth hanger
Many smaller canvas prints already have a hanger, but if yours doesn’t, screw a sawtooth hanger into the back of the frame. Position it in the middle so the print hangs evenly.
Step 3 – Hammer the nail
Place a nail or screw at your pencil mark and tap it into the wall at a slight upward angle. Leave a bit of space so the hanger can rest securely.
Step 4 – Hang and adjust
Hang the canvas on the nail and check it with a level. Adjust gently until it’s straight.
If you’re interested in how to hang canvas without nails, adhesive picture strips can hold smaller prints as long as the surface is smooth and clean. They’re easy to remove and won’t damage walls.
Hanging Large Canvases
Large canvas art makes a bold statement, but it also needs stronger support to stay secure on the wall. The best method uses D-rings and picture wire because it spreads the weight evenly and keeps the frame stable.
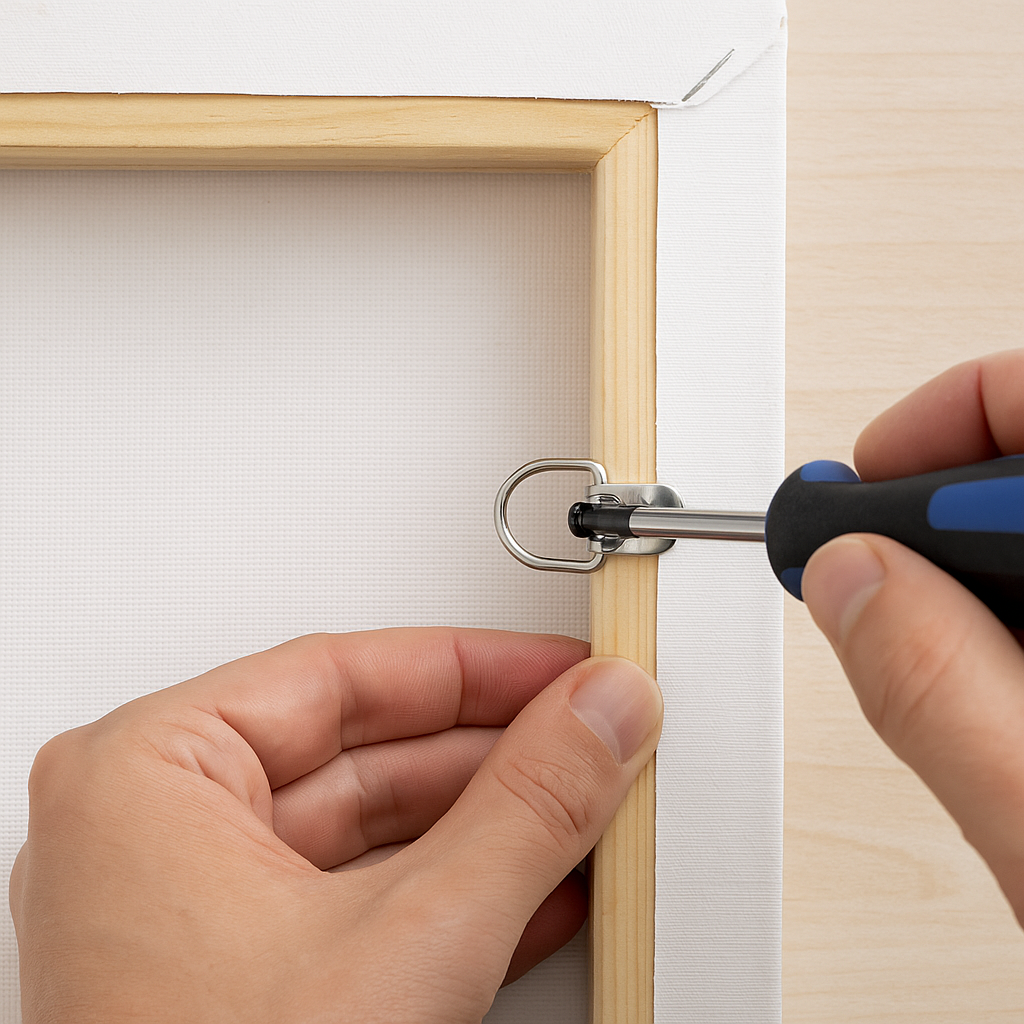
Step 1 – Attach the D-rings
Turn your canvas face down on a clean surface. Measure about one quarter of the way down from the top on both sides of the frame. Mark these spots with a pencil, then screw in the D-rings. Placing them at equal height ensures your canvas will sit straight once hung.
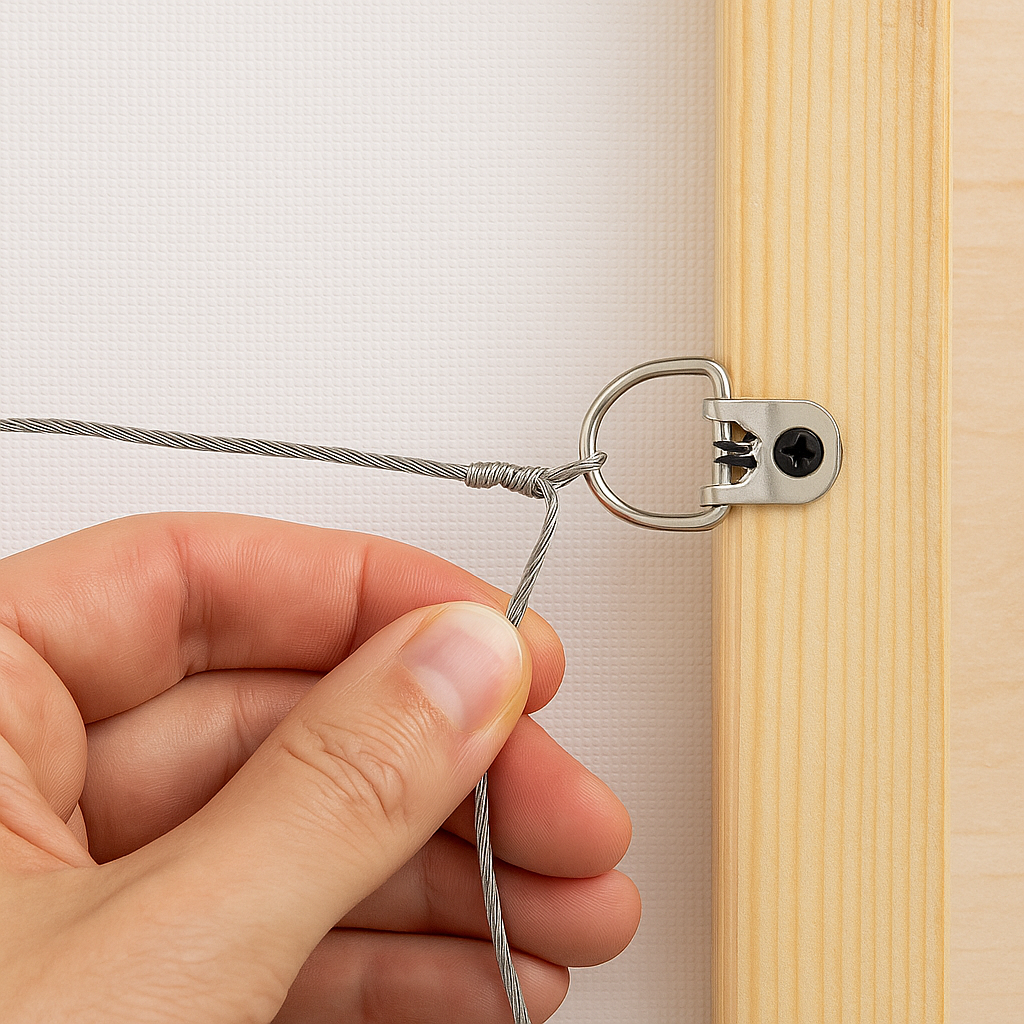
Step 2 – Thread the hanging wire
Cut a length of picture wire that’s slightly wider than the canvas. Feed the wire through one D-ring, pull it across to the other side, and loop it through the second ring. Twist the ends tightly so the wire won’t slip. Leave a little slack in the middle, this creates a point where the wire will rest securely on the wall hooks.
Step 3 – Mark and install the wall hooks
Measure the width of your canvas and decide how high you want it to hang. Make two pencil marks on the wall, spaced to match the distance between your D-rings. Install heavy-duty picture hooks or screws at these points. Using two hooks instead of one keeps the canvas from shifting over time.

Step 4 – Hang and level the canvas
Lift the wire over both hooks and gently lower the canvas until it rests flat against the wall. Step back and use a level to check alignment. Adjust the wire slightly on the hooks if needed until the print is perfectly straight.

For heavier pieces, wall anchors can provide extra strength, especially if you’re hanging on drywall. If you prefer how to hang canvas without nails, keep in mind that adhesive strips usually won’t hold the weight of a large frame sturdy hooks or screws are the safer option.
Extra Tips To Hang Canvas Prints Perfectly:
Hang at the right height
Artwork feels balanced in a room when it’s placed at eye level. The general rule is about 57 inches from the floor to the center of the canvas. This standard is used in galleries and makes the viewing experience comfortable.
Keep spacing consistent
If you’re hanging more than one canvas, plan out the arrangement before picking up the hammer. Use a measuring tape to leave equal gaps between pieces, usually 2 to 3 inches. Consistent spacing creates a clean, professional look, especially in gallery walls.
Choose nail-free options wisely
For renters or anyone avoiding holes in the wall, heavy-duty adhesive strips are a good alternative. They’re best for lightweight canvases on smooth surfaces. Always check the weight limit on the packaging to make sure your canvas will stay secure.
FAQs
How do you hang a canvas without nails?
Adhesive picture strips or wall hooks are designed for this purpose. They stick directly to the wall, support small to medium prints, and can be removed without damage. They’re especially useful for apartments or freshly painted walls.
How do you keep canvas art straight?
Use a level right after hanging the canvas. For larger or heavier prints, hang them on two hooks instead of one—this spreads the weight evenly and prevents the frame from shifting over time.
Can you hang canvas art on drywall?
Yes. Standard nails or picture hooks work well for light and medium-sized prints. For heavier canvases, add wall anchors before inserting screws or hooks. This keeps the canvas secure and prevents the hardware from loosening inside the drywall.
Can you hang canvas with Command Strips?
Yes, Command Strips work well for lightweight canvas prints. Make sure the surface is smooth and clean before applying them. Heavier canvases should still be hung with hooks or screws for safety.
Do canvas prints need a frame to hang?
No. Canvas prints are stretched over a wooden frame, so they’re sturdy enough to hang as they are. Many come with sawtooth hangers or are ready to hang straight out of the box.
What’s the best way to arrange multiple canvas prints?
Start by laying the canvases on the floor to test different layouts. Once you’ve chosen a design, measure equal spacing—about 2 to 3 inches between each piece—and mark the wall before hanging. This makes the grouping look balanced and intentional.
Here are some layout tips:
- Symmetrical Layouts: Best for formal spaces like dining rooms. Align prints in a grid or centered pattern.
- Asymmetrical Layouts: Great for modern living rooms. Mix different sizes and spacing for an eclectic look.
- Canvas Collage Wall: Combine photos, quotes, and art. Keep the largest canvas collage piece near the center and build around it.
Final Thoughts,
Hanging canvas art doesn’t need to be complicated. With the right tools and a clear plan, you can have your prints up and looking straight in just a few minutes. Small pieces are easy with a single nail or hanger, while larger canvases stay secure with D-rings and wire. For renters or lighter prints, adhesive strips can give you a nail-free option.
Once your canvas is in place, step back and enjoy how it changes the feel of the room. And if you’re ready to add more, explore custom canvas prints from CanvasChamp—delivered ready to hang so you can create your own gallery wall without the hassle.