How to Clean Canvas Prints: A Step-by-Step Guide for Longevity

Listen to Content
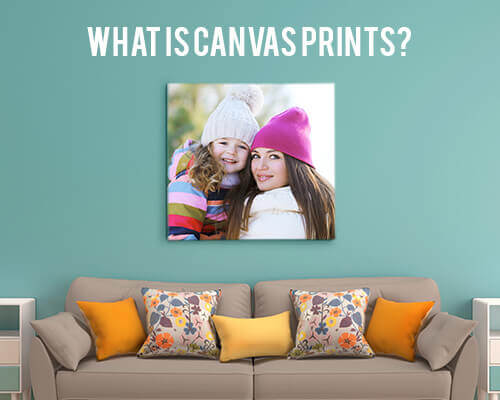
Canvas prints transform ordinary photographs into gallery-worthy art, but dust, fingerprints, and environmental exposure can dull their vibrance over time. Knowing how to clean canvas prints properly makes the difference between artwork that lasts decades and pieces that deteriorate within years. The good news: maintaining your canvas art requires minimal effort when you understand the materials involved and use the right techniques.
Most canvas damage occurs not from neglect but from well-intentioned cleaning with inappropriate products. Household cleaners, excessive water, and rough cloths cause more harm than the dust they remove. This guide walks you through safe, effective maintenance methods that protect your investment while keeping your prints looking freshly hung.
Understanding Your Canvas Print Material
Canvas prints consist of multiple layers working together: the canvas substrate, ink layer, and protective coating. Each component responds differently to cleaning agents and techniques. Before touching your artwork, understanding what you're working with prevents costly mistakes.
The Difference Between Solvent and Pigment Inks
Modern canvas prints typically use one of two ink technologies. Eco-solvent inks bond chemically with the canvas fibers, creating a durable surface that resists light fading and moisture. These prints handle gentle cleaning well because the ink penetrates the material rather than sitting on top.
Pigment inks deposit microscopic particles onto the canvas surface. While they produce exceptional color accuracy and longevity, the surface layer is more vulnerable to abrasion. Rubbing too aggressively can lift pigment particles, creating visible wear patterns. If you're unsure which ink type your canvas uses, treat it as pigment-based and err toward gentler methods.
Identifying Protective Coatings and Varnishes
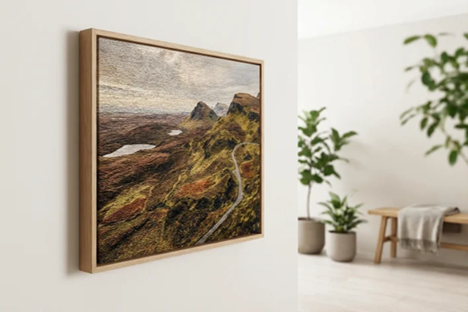
Quality canvas prints, like those from CanvasChamp, include protective coatings that shield the ink from UV damage, moisture, and physical contact. These coatings range from matte to glossy finishes and affect how you should clean the surface.
Glossy coatings show fingerprints more readily but wipe clean easily. Matte finishes hide minor smudges but can develop a sheen if cleaned with oil-based products. Run your finger lightly across an inconspicuous edge to feel whether your print has a smooth, sealed surface or a more textured, uncoated feel.
Essential Tools and Supplies for Safe Cleaning
Gathering proper supplies before you start prevents mid-cleaning scrambles that might lead to grabbing whatever's handy, often with damaging results.
Choosing the Right Microfiber Cloths
Not all microfiber cloths perform equally. Look for cloths with a GSM (grams per square meter) rating between 250 and 400 for optimal dust capture without excessive texture that could scratch coatings. Avoid microfiber cloths with scrubbing strips or textured patterns designed for kitchen use.
Keep dedicated clothes for canvas cleaning only. Cloths previously used with household cleaners retain chemical residues that transfer to your artwork. Wash canvas-cleaning cloths with water only, no fabric softener, which leaves films that streak prints.
Safe Solutions vs. Chemicals to Avoid
For most cleaning situations, distilled water works perfectly. Tap water contains minerals that leave deposits when dried, creating spots that require additional cleaning. If you need more cleaning power, mix distilled water with a drop of mild dish soap, emphasis on mild and minimal.
Avoid glass cleaners, all-purpose sprays, alcohol-based products, and anything containing ammonia. These strip protective coatings, fade inks, and can cause canvas fibers to deteriorate. Furniture polish and dusting sprays leave oily residues that attract more dust and alter the print's finish.
Step-by-Step Maintenance and Deep Cleaning
Regular maintenance prevents buildup that requires aggressive cleaning. Establishing a simple routine keeps your canvas prints vibrant with minimal effort.
Dry Dusting Techniques for Weekly Care
Weekly dusting takes under a minute per print and prevents particle accumulation that can scratch surfaces during deeper cleaning. Use a clean, dry microfiber cloth and wipe in one direction, top to bottom, with light pressure.
For textured canvas surfaces, a soft-bristled brush (like a clean makeup brush or dedicated art brush) reaches into the weave pattern where cloths miss. Hold the canvas steady with one hand while brushing with the other to avoid knocking it off the wall.
Removing Stubborn Stains with Damp Cleaning
When dry dusting won't remove a mark, dampen your microfiber cloth with distilled water. Wring it thoroughly until barely moist; the cloth should feel cool but not wet to the touch. Gently dab the affected area rather than rubbing. Rubbing spreads stains and risks damaging the ink layer.
For sticky residues like food splashes or adhesive marks, let the dampened cloth sit on the spot for 30 seconds to loosen the material before dabbing. Work from the outside of the stain toward the center to prevent spreading. Allow the canvas to air dry completely before assessing whether repeat treatment is needed.
Addressing Back-of-Canvas Dust Accumulation
Dust collects behind wall-mounted canvas prints, and this buildup eventually migrates to visible surfaces. Every few months, remove your canvas from the wall and use a soft brush or a vacuum with a brush attachment to clean the back and the wall-mounting area.
Check the stretcher bars for dust accumulation and spider webs. While you have the canvas down, inspect the mounting hardware for stability. This maintenance session takes 5 minutes and significantly extends your artwork's lifespan.
Common Mistakes That Damage Canvas Art
Understanding what harms canvas prints is as important as knowing proper techniques. These errors account for most canvas damage.
The Dangers of Excessive Moisture and Scrubbing
Water is the canvas's enemy when used carelessly. Excessive moisture warps the canvas material, loosens it from the stretcher bars, and can cause mold growth in humid environments. If water drips down the canvas surface, it leaves visible tide marks as minerals concentrate at the drying edge.
Scrubbing motions, even with soft cloths, create friction that wears through protective coatings and lifts ink. The temptation to scrub increases with stubborn marks, but patience with repeated gentle dabbing always produces better results than aggressive rubbing.
Why Household Cleaners Are Too Abrasive
Standard household cleaners contain surfactants, solvents, and pH modifiers designed for hard surfaces like glass and countertops. These chemicals dissolve the protective coatings on canvas prints, leaving the ink exposed to UV damage and physical wear.
Even "gentle" cleaners formulated for delicate surfaces often contain ingredients that interact poorly with printing inks. The damage may not appear immediately, but becomes visible over months as colors fade unevenly or coatings develop cloudy patches.
![]()
Preventative Care for Long-Term Preservation
The best cleaning strategy minimizes the need for cleaning through smart display choices and environmental control.
Optimal Display Locations to Avoid Sun Damage
Direct sunlight fades canvas prints faster than any other factor. UV radiation breaks down ink molecules, causing colors to shift and lose intensity. Position canvas prints on walls that don't receive direct sun, or use UV-filtering window treatments in sunny rooms.
Artificial lighting matters too. LED lights produce less UV than fluorescent bulbs and generate less heat. If you use spotlights to illuminate artwork, choose LED options and position them to avoid concentrated heat on the canvas surface.
Managing Humidity and Temperature Fluctuations
Canvas expands and contracts with changes in humidity. Repeated cycling causes the material to loosen on stretcher bars and can crack protective coatings. Keep canvas prints away from bathrooms, kitchens, and exterior walls where temperature and humidity fluctuate most.
Ideal conditions include relative humidity of 45–55% and stable temperatures between 68–72°F (20–22°C). If you live in a climate with extreme seasonal changes, consider running a dehumidifier or a humidifier to moderate indoor humidity levels.
Frequently Asked Questions
Can I use Windex or glass cleaner on canvas prints?
No. Glass cleaners contain ammonia and other solvents that strip protective coatings and damage printing inks. Stick to distilled water or water with minimal mild soap.
How often should I clean my canvas prints?
Dust weekly with a dry microfiber cloth. Perform damp cleaning only when visible stains appear, typically every few months, depending on your environment.
What should I do if my canvas print gets wet?
Blot excess moisture immediately with a dry cloth. Stand the canvas upright in a well-ventilated area away from direct heat sources. Allow it to dry naturally for 12–24 hours.
Can I restore a faded canvas print?
Significant fading from UV damage is permanent. Some professional art restorers offer color correction or reprinting services, but prevention through proper display location is far more effective than restoration.
Protecting Your Canvas Investment
Proper cleaning and preventative care ensure your canvas prints remain vibrant for years. The techniques covered here require minimal time and no specialized equipment, just attention to materials and gentle handling. For those looking to add new pieces to their collection, CanvasChamp offers premium canvas prints with protective coatings designed for longevity, backed by quality materials and competitive pricing. Browse their selection to find your next piece of personalized wall art.